Browsing into the Project view and the Employee view menus
| DMF |
2501** PROJECT SCHEDULE VIEW * |
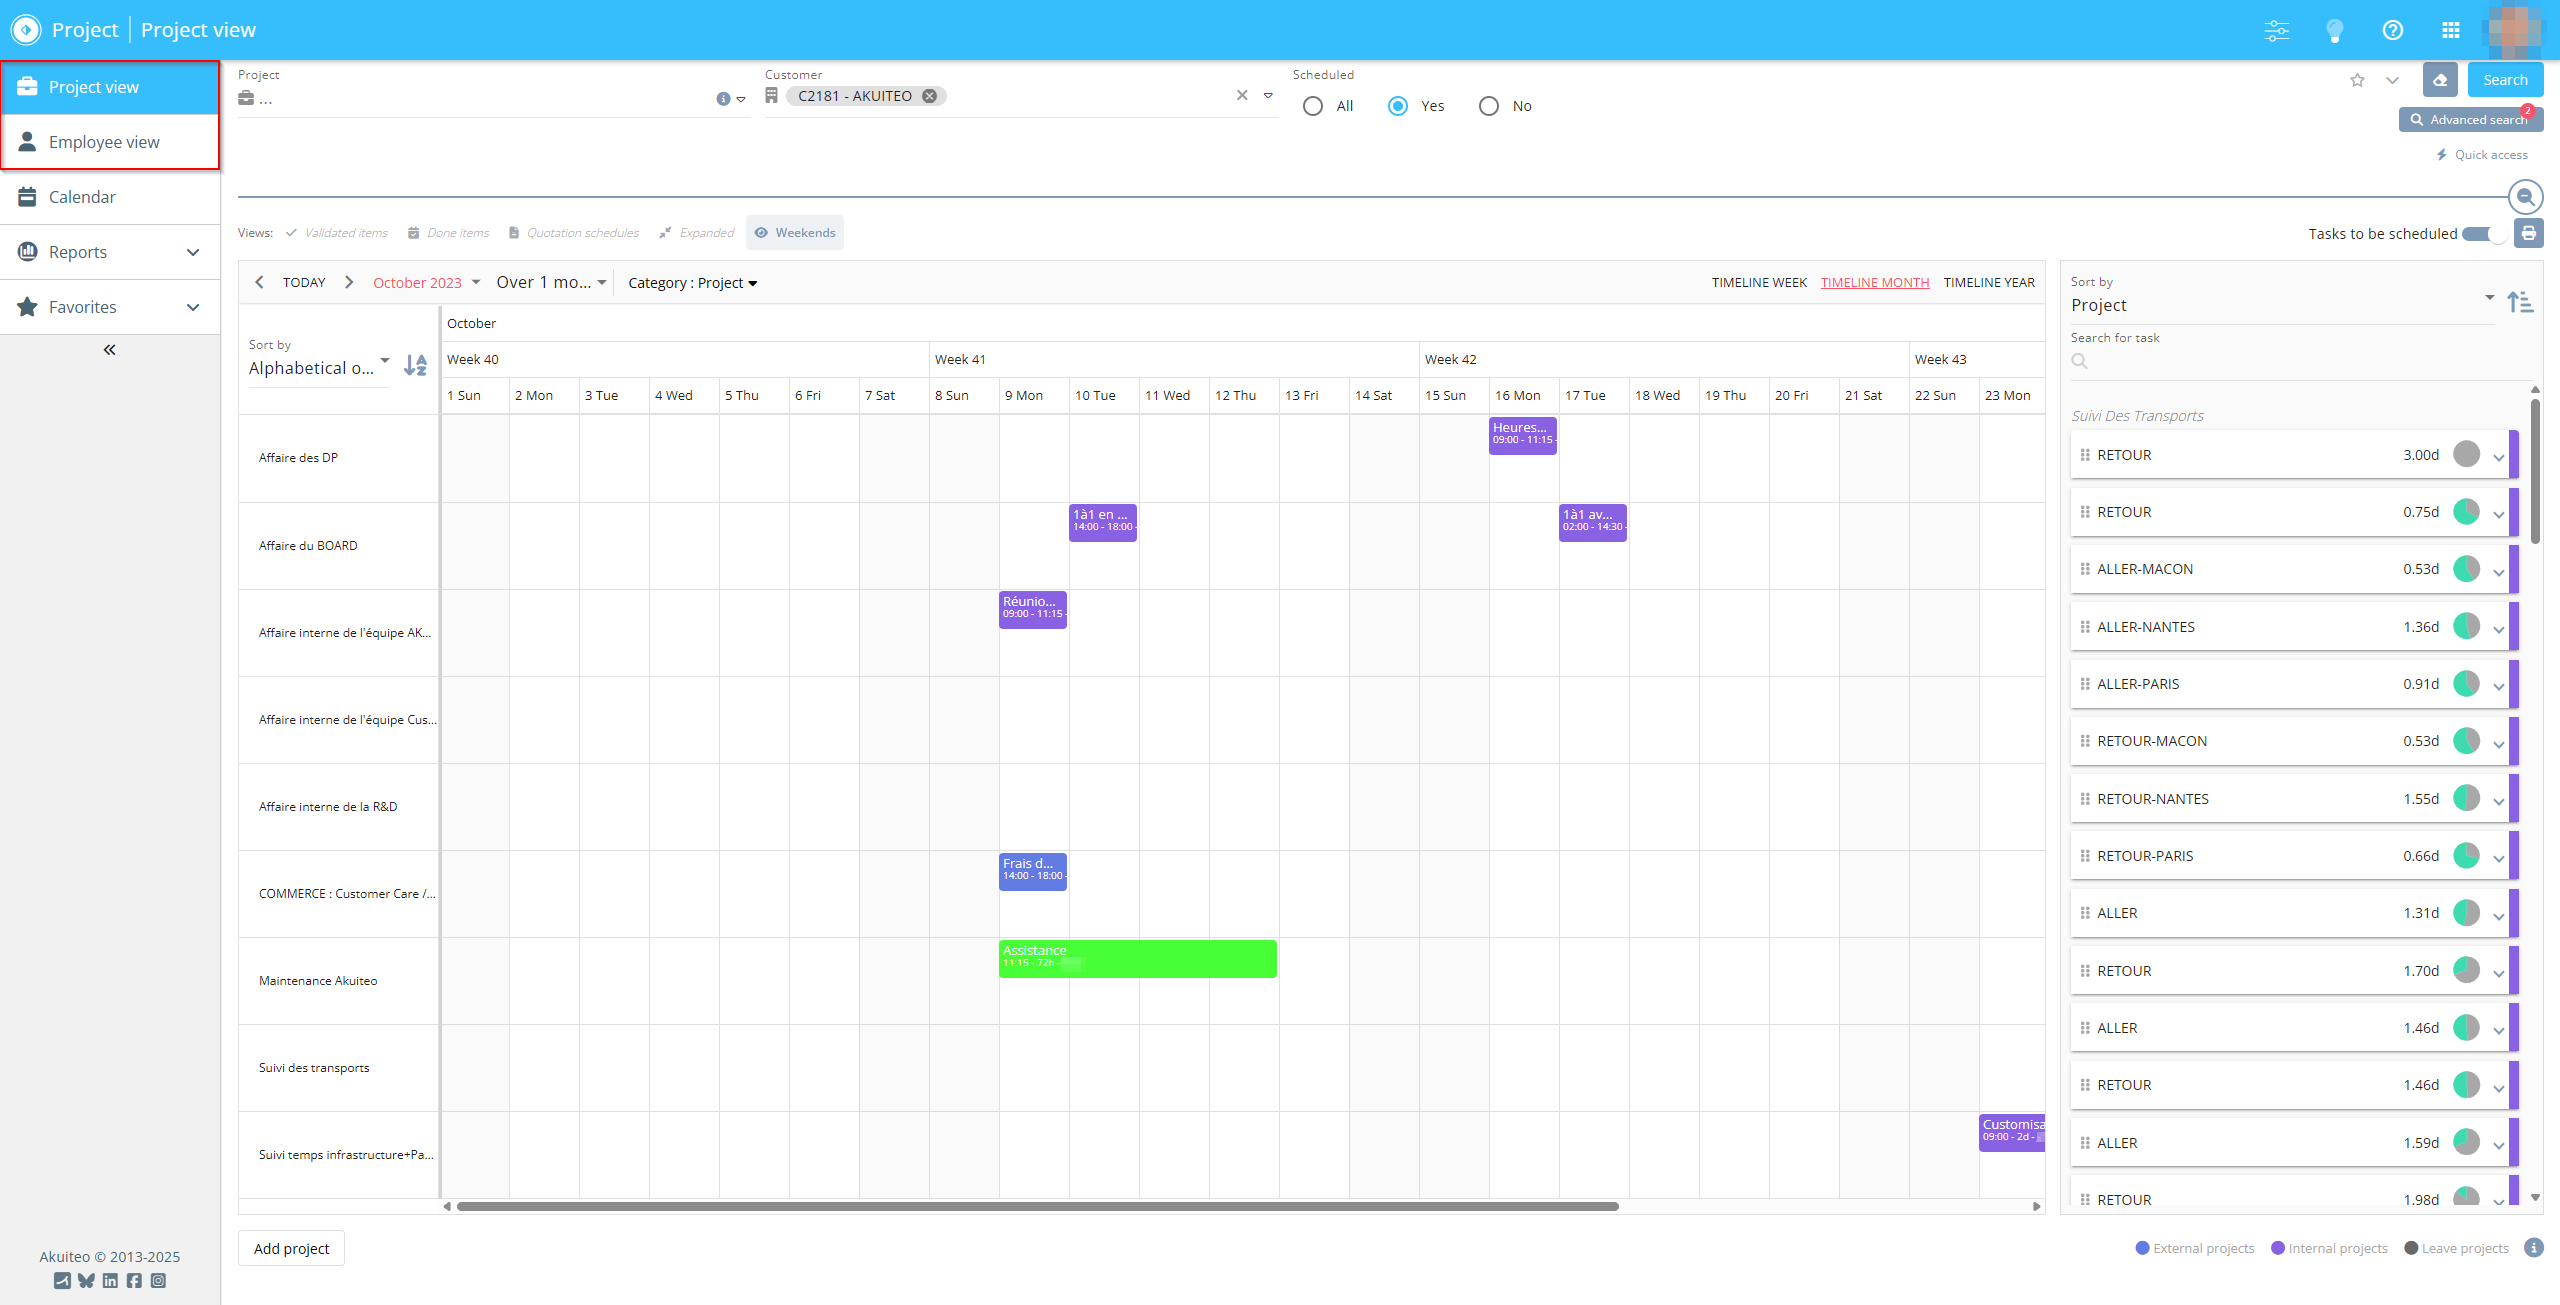
The Project menu helps the planner create scheduled items in a weekly, monthly or yearly view. The Schedule can be accessed:
- by clicking on the
 Project view menu or the
  Employee view menu on the left to access the scheduling page,
 - From the
 Favorites menu on the left, by clicking on a saved search putted in favorite.
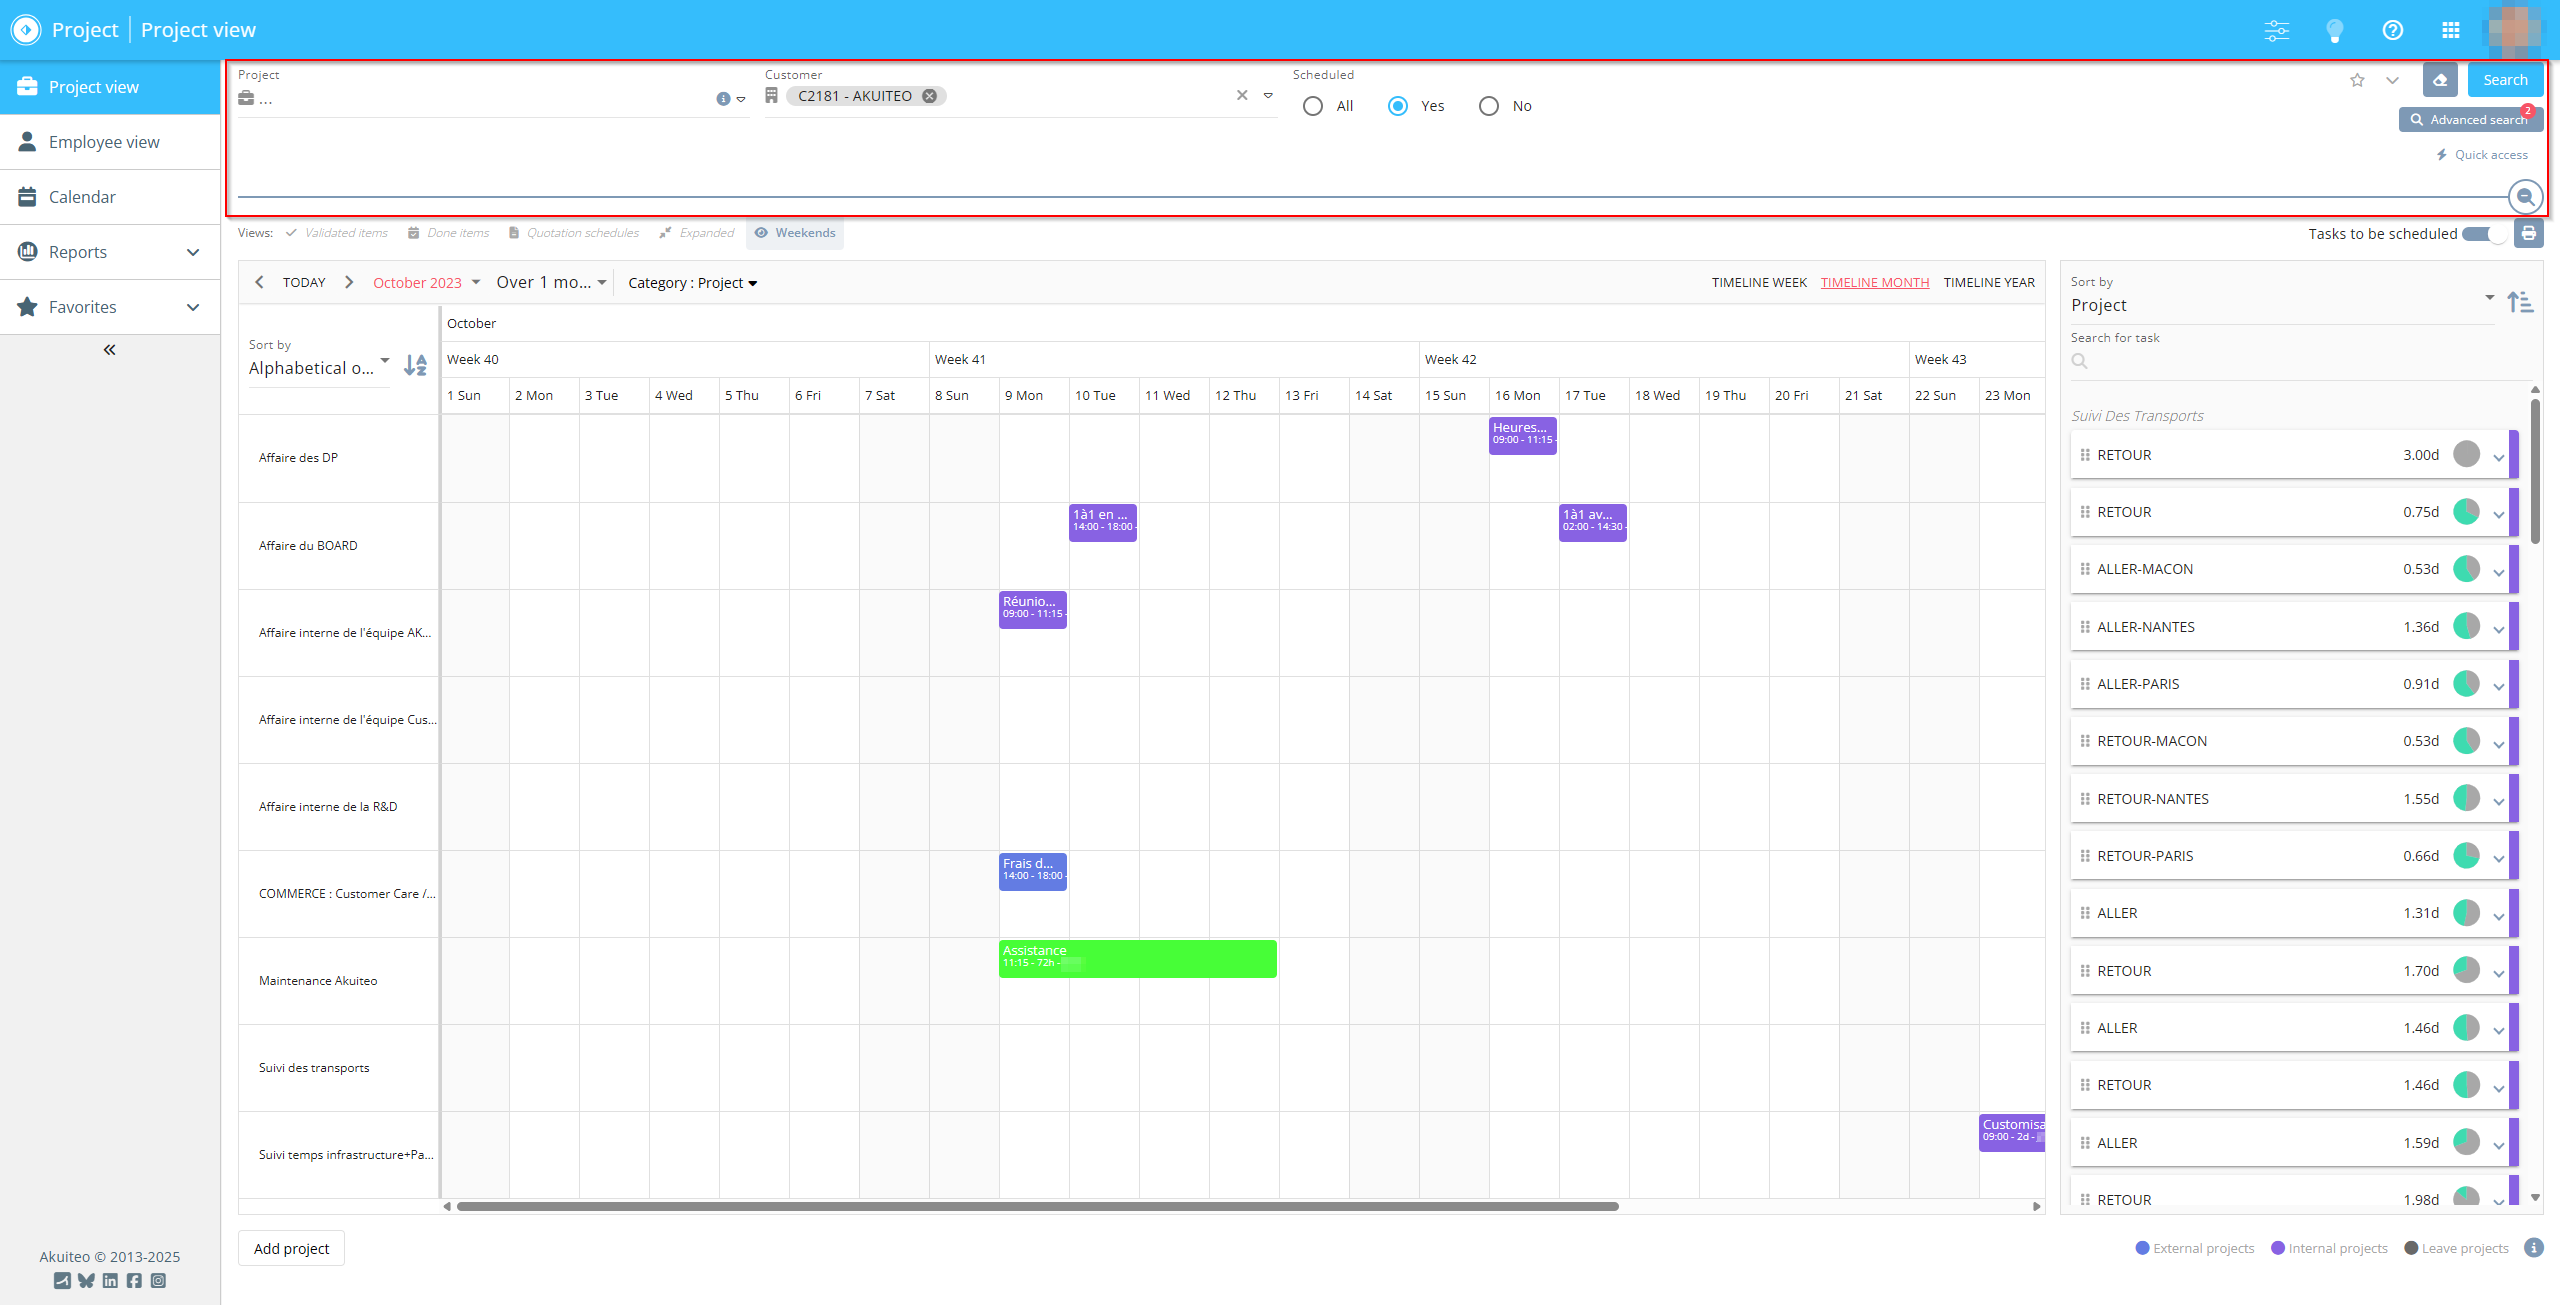
At the top of the screen, a search interface can be used to filter scheduled items to be displayed in the calendar.
The search interface of the screen can be hidden by clicking on  . To display it again, click on
  .
.
Reference
For more information about searching, refer to Performing a search.
Depending on the criteria available in advanced search, three tabs can be displayed in the advanced search window in order to highlight three types of filters:
- Full filters: the resources matching the specified full filters are displayed. The scheduled items that do not match a full filter are displayed in the calendar but are shaded; a color border helps identify the type of item.
- Project filters: the project filters are used to display or hide the projects that match or do not match the specified filters. This tab can only be accessed in the Project View menu.
- Employees filters: the employees filters are used to display or hide the employees who match or do not match the specified filters.
- Schedule filters: the schedule filters hide the scheduled items that do not match the specified filters.
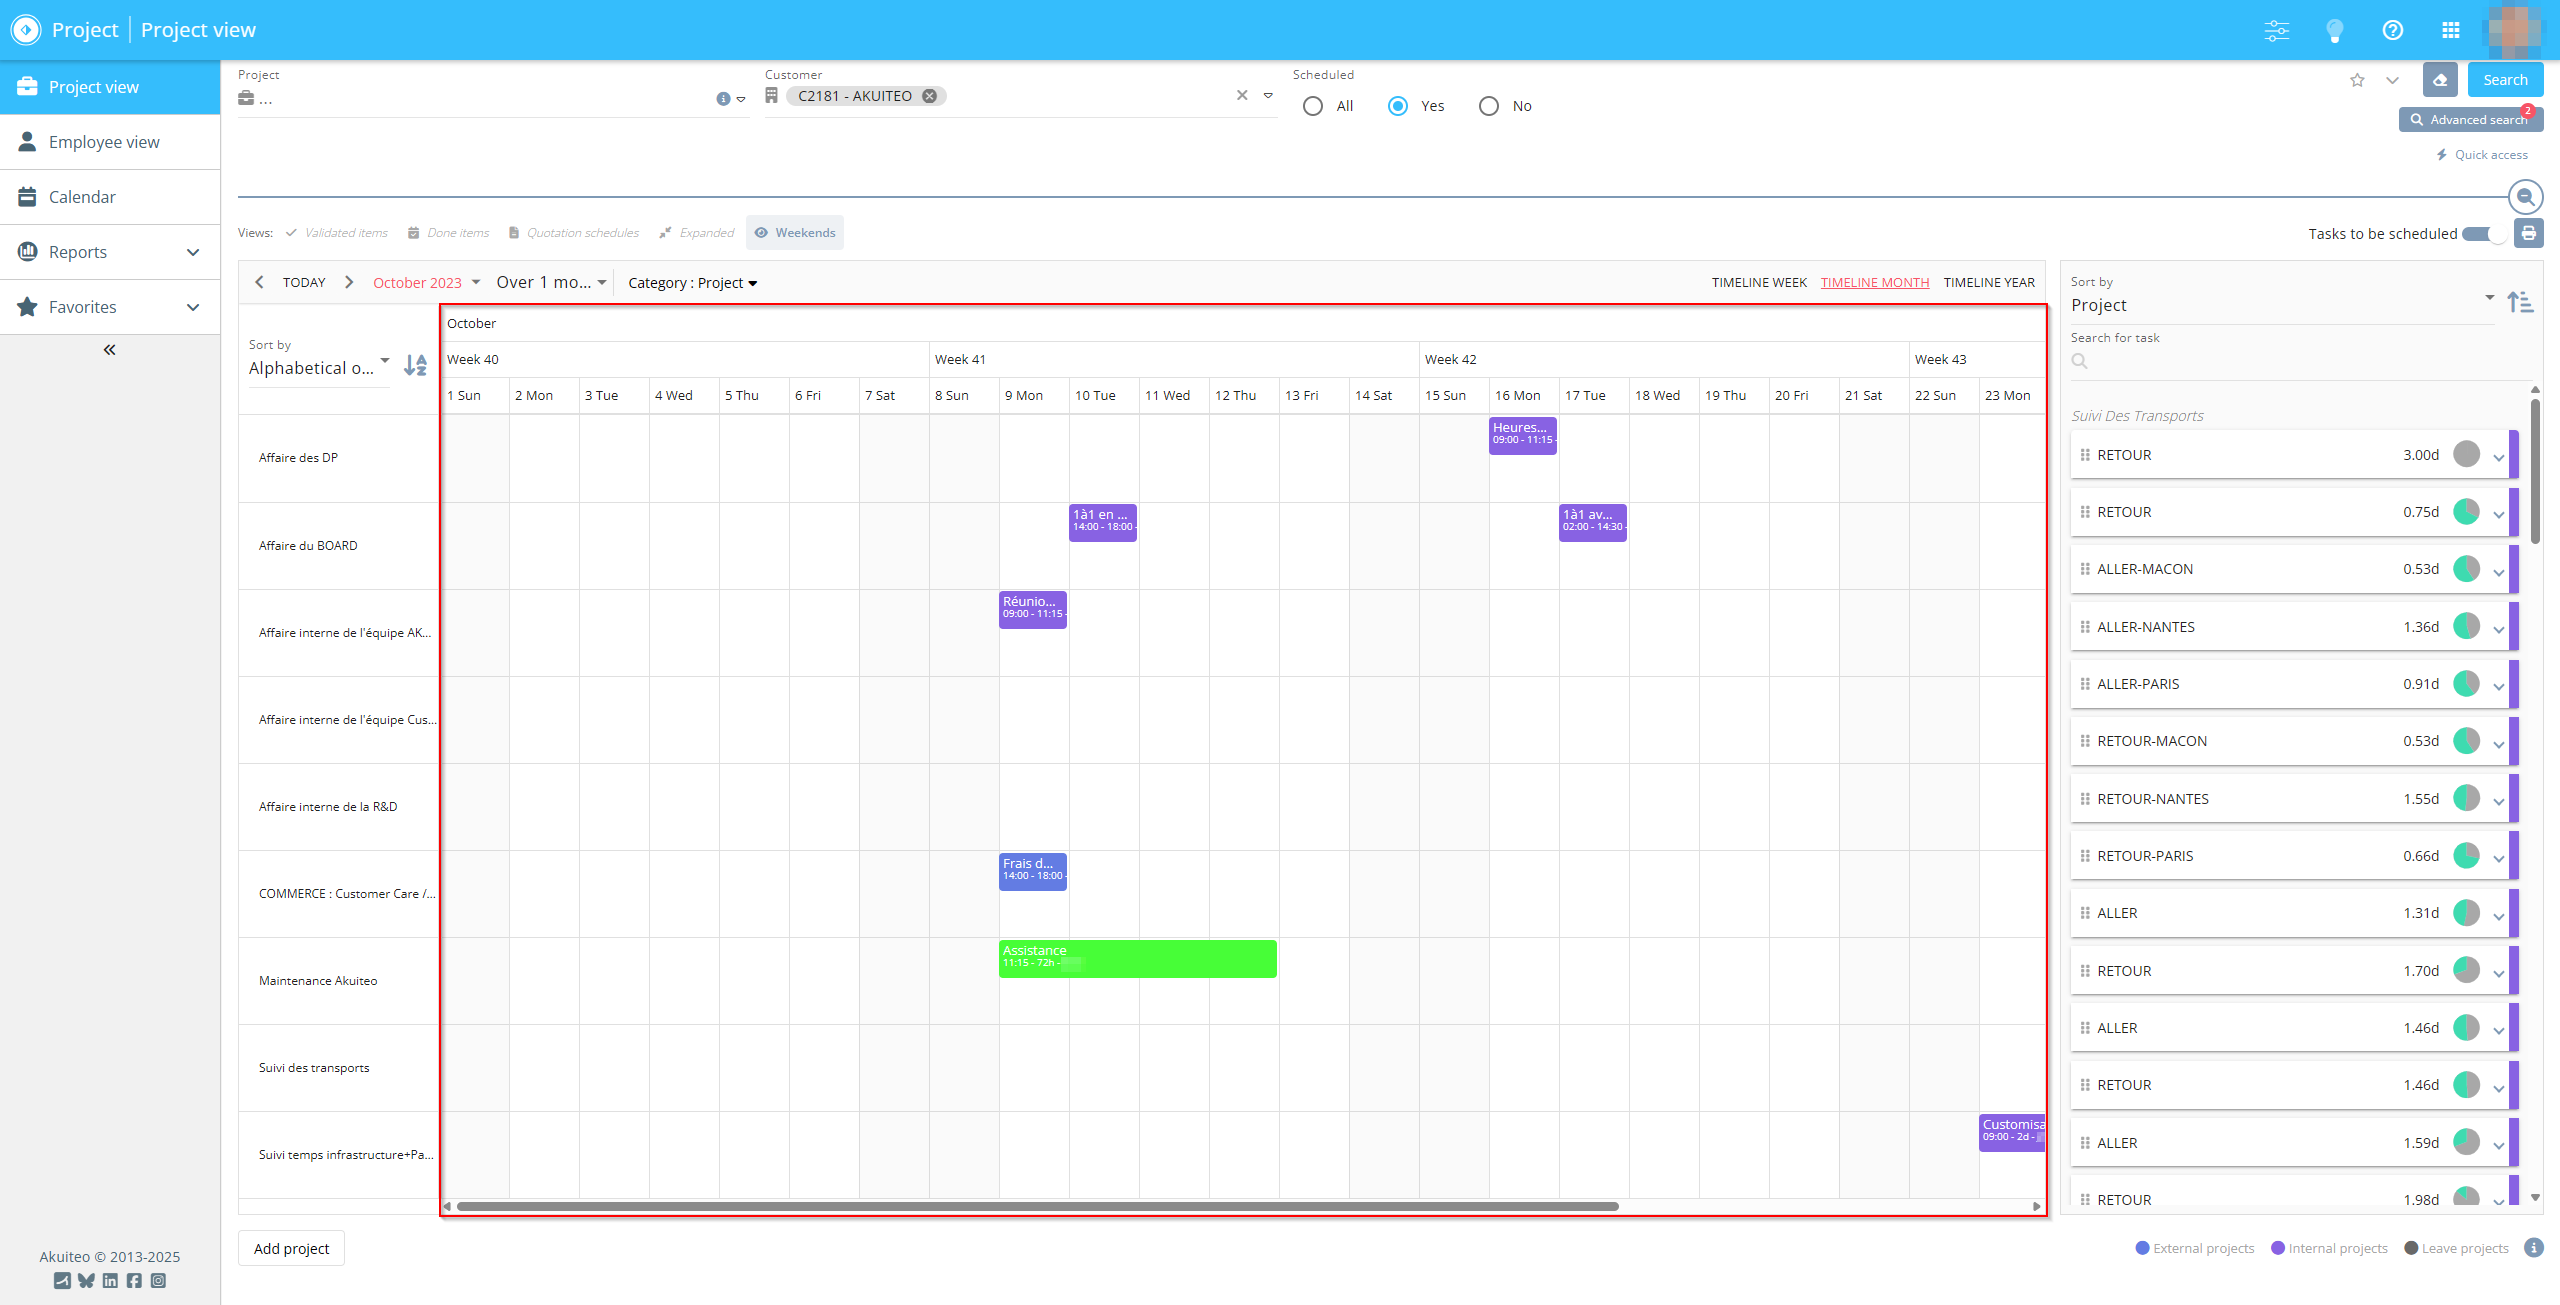
The calendar displays scheduled items that match the search made using the filters of the search interface.
In the calendar, each scheduled item is represented by a colored block. This color can be changed for each unit or depending on the project or project type.
Reference
For more information on how to customize colors assigned to scheduled items, refer to Customizing the color of a scheduled item.
Each block displays specific information. To show further information, hover over a schedule block to display more details in a tooltip. You can also click on a schedule block to open a form, on the right of the screen, with comprehensive information on the scheduled item.
Reference
The information displayed by default can be customized. For more information, refer to Customizing the information displayed in a schedule block.
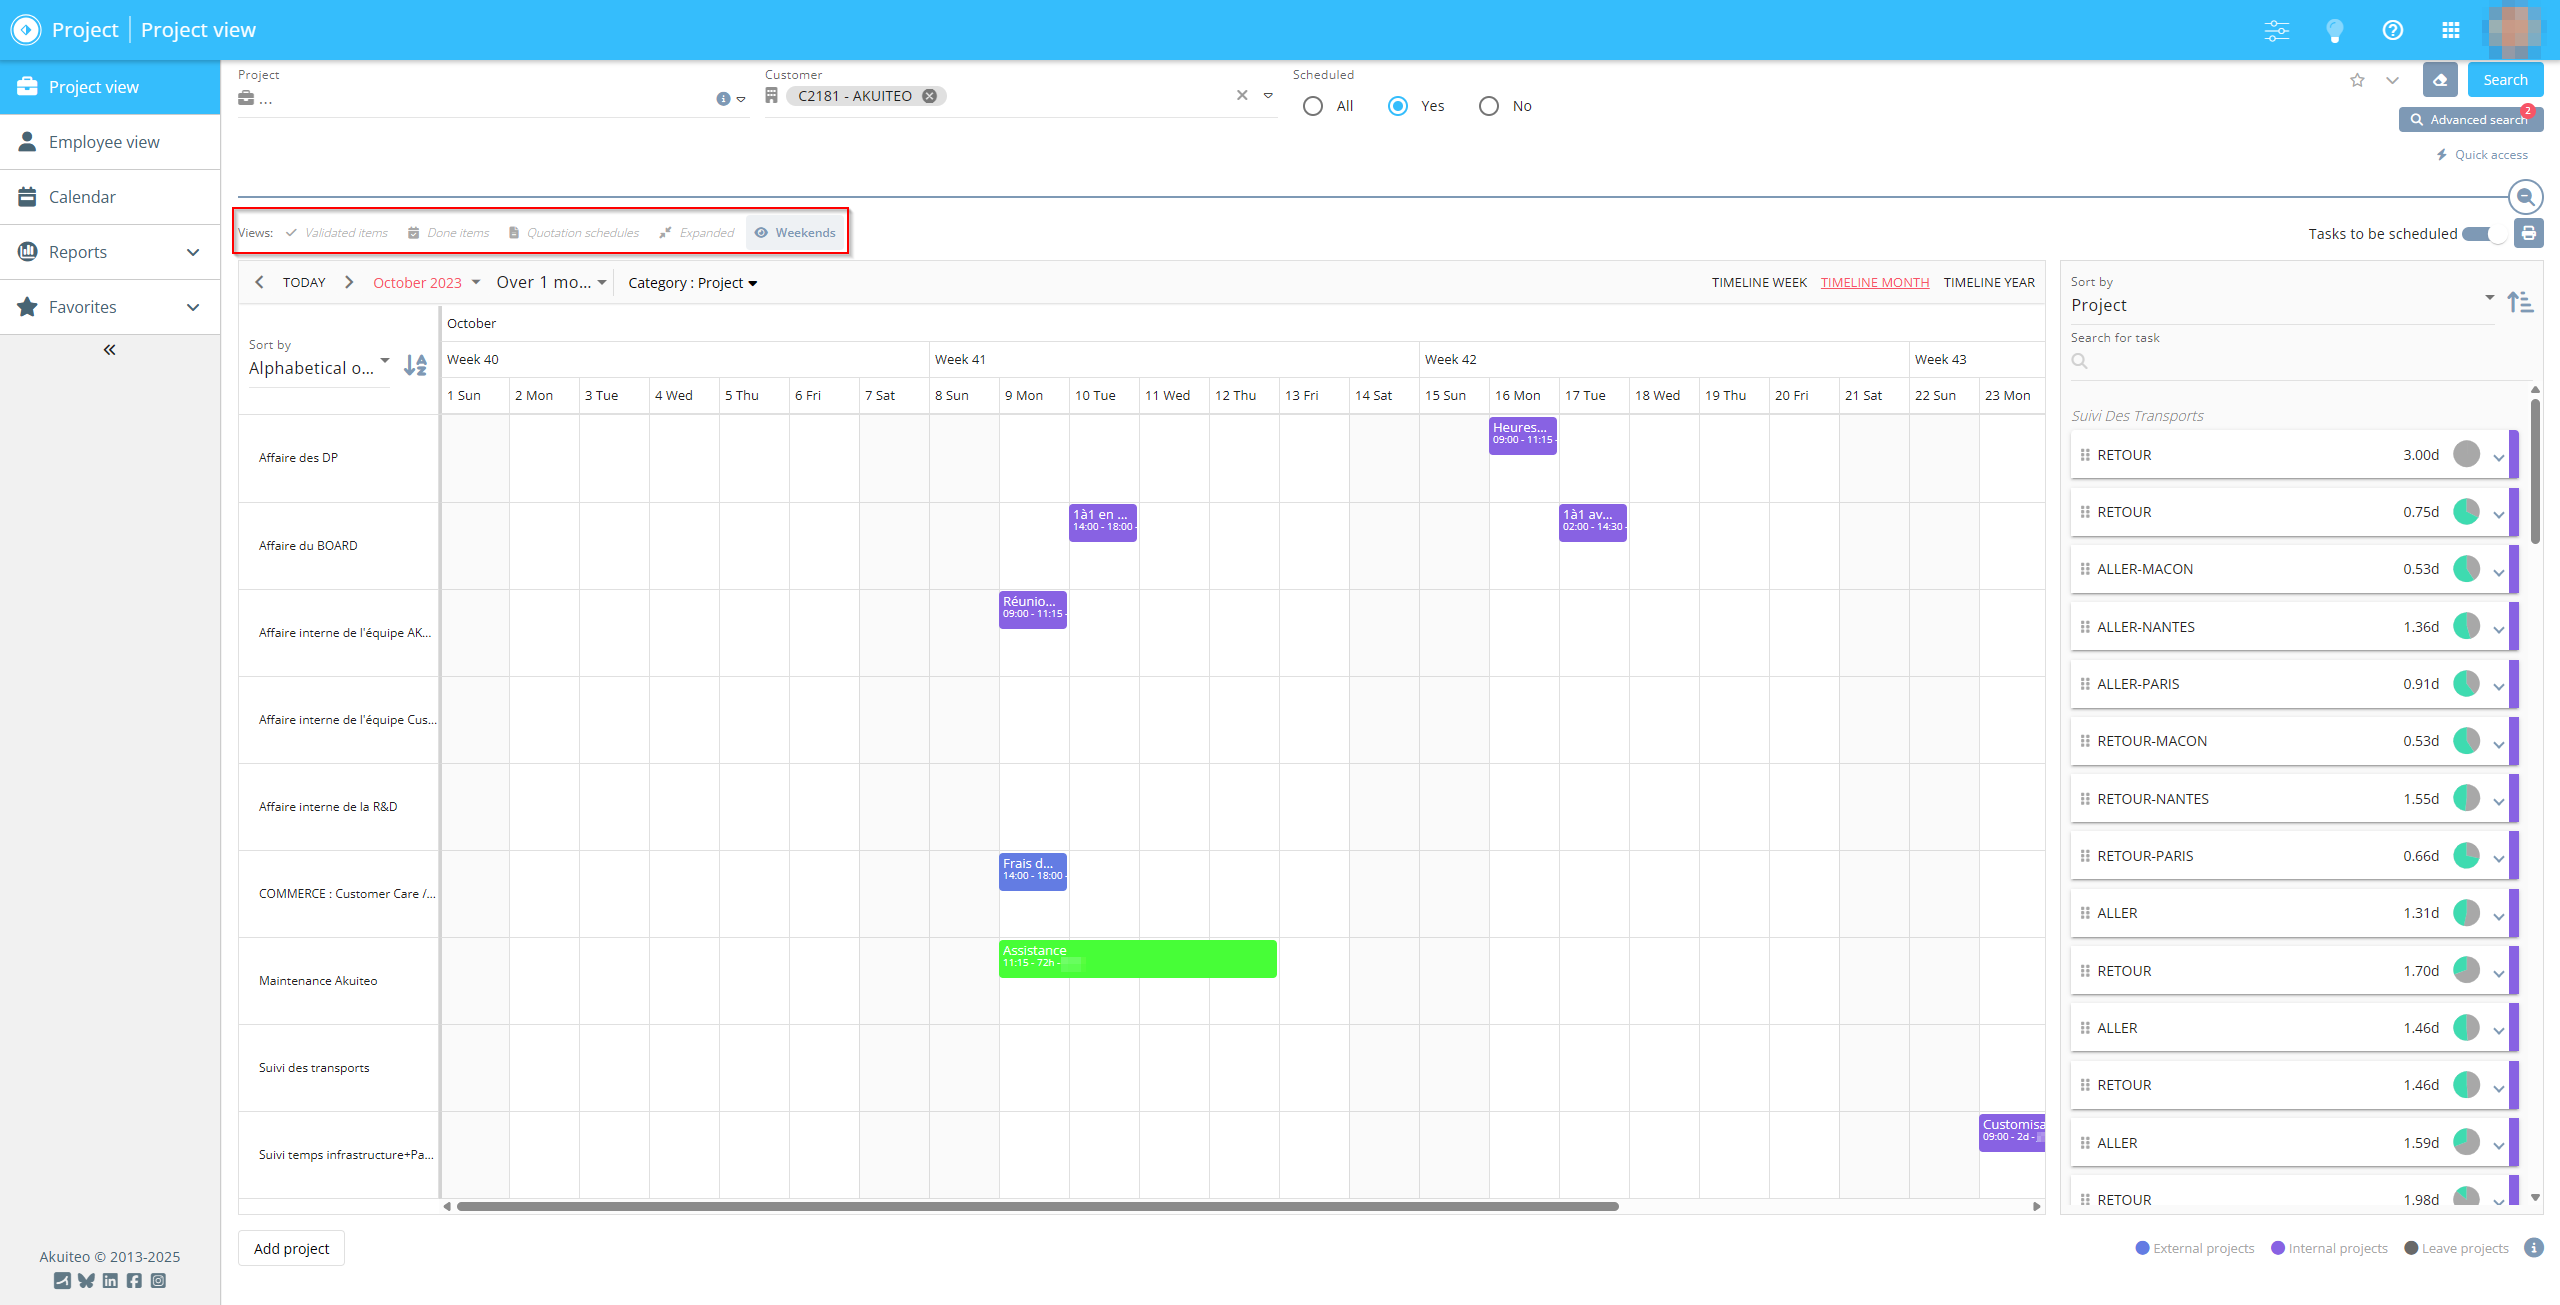
Views are used to highlight certain types of scheduled items or modify the way items are displayed in the calendar. These views are found above the calendar.
Click on a view to enable or disable it. Views that are not enabled are grayed out.
| View | Description |
|---|---|
| Validated items | When this view is enabled, validated scheduled items are grayed out and transparent, to highlight the scheduled items that are not yet validated. |
| Done items | When this view is enabled, done scheduled items are identified with a  icon, added at the top left of the scheduled item. icon, added at the top left of the scheduled item. |
| Quotation schedules |
When this view is enabled, scheduled items generated from customer quotations are displayed in the calendar. Quotation schedules are displayed in a white background and their color code differs from the one used for schedules. When a quotation becomes an invoice, all the schedules linked to it are now considered as standard scheduled items. Note Until they are validated, quotation schedules are not taken into account when calculating an employee's workload, occupancy and scheduled rates. |
| Scheduled rate (Employee view only) |
Important To show the Scheduled rate display option, the Reference For more information about the When this view is enabled, the scheduled rate excluding holidays is displayed (in percentage) in the first column of the calendar, below the name of each employee. The calculation rules of the scheduled rate are set up in the management rule. For the timeline, the calculation is based on the 1st day of the month until the last one. The following color code is used:
Hover over the scheduled rate indicator to display, in a tooltip, the number of scheduled days, validated leaves and worked days used to calculate the scheduled rate. Target scheduled ratesImportant Target scheduled rates management must be enabled from the Settings Portal (see Setting up target scheduled rates). On the record sheet of each employee, a target scheduled rate can be specified. It is the scheduled rate that the employee must ideally reach every month. Reference For more information on specifying the target scheduled rate, refer to Entering general information and contact details. When the Scheduled rate view on Project is enabled, an indicator is visible on the line of each employee who has a target scheduled rate. The color of that indicator changes depending on the scheduled rate of the employee in comparison to their target scheduled rate:
When hovering over the indicator, the target scheduled item of the employee is displayed as a tooltip. |
| Under/over-scheduled days |
When this view is enabled, an indication is shown at the bottom right of the box of a day:
This icon is displayed on days that have scheduled items (validated or not, done or not) which duration does not cover a full day. |
| Remote work (Employee view in TIMELINE MONTH display only) |
When this view is enabled, days or half-days declared by employees as remote work are displayed with a background color:
|
| Expanded |
When this view is enabled, all the schedule blocks of each day are displayed. As a result, the line height will vary depending on the number of items scheduled for a day. When this option is disabled, only one schedule block is displayed if several items are scheduled for the same day:
Additional items are displayed in a +X format. Click on +X to open a pop-up window that will display all the scheduled items for the selected day. |
| Weekends |
When this view is enabled, the days of the weekend are displayed in the calendar. When this view is disabled, the calendar runs from Monday to Friday. |
 when an employee scheduled rate stands below 100%, meaning the employee still has empty time slots.
 when the employee has been scheduled for the entire displayed timeline.
 when the employee scheduled rate exceeds 100%, meaning the employee is over-scheduled.
 when the target scheduled rate of the employee is inferior to their target scheduled rate. Scheduled items can then be specified on this employee in priority.
 when the scheduled rate of the employee is equal or superior to their target scheduled rate.
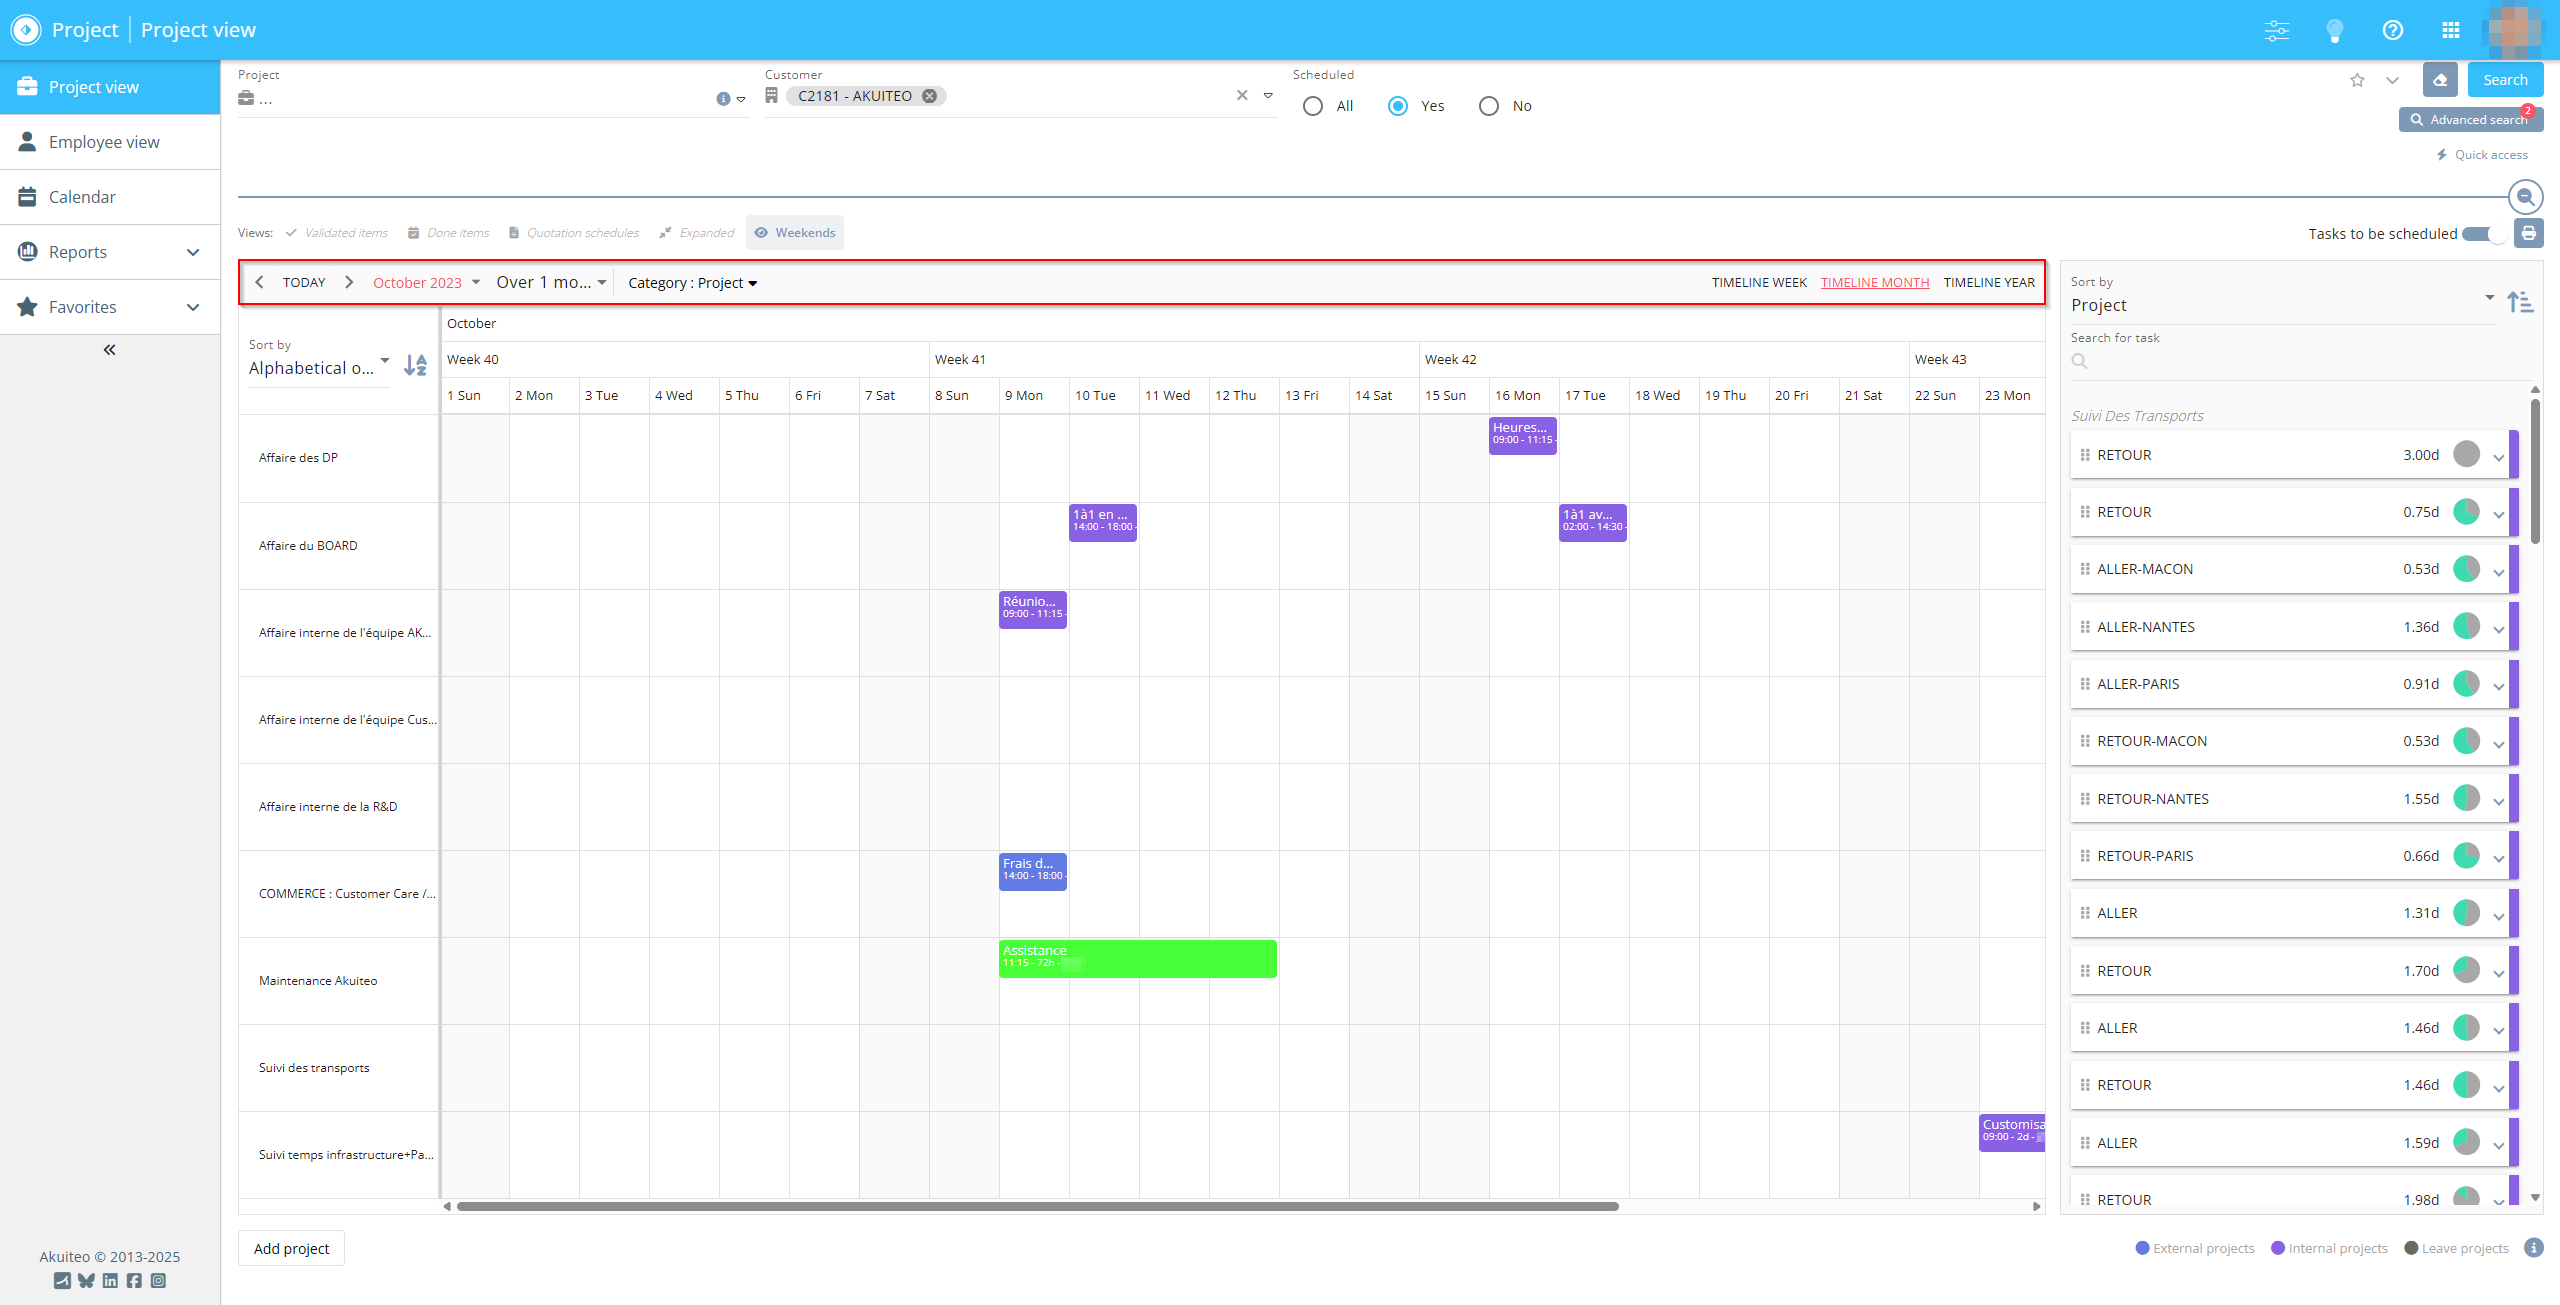
The calendar header is used to manage the display period on the calendar, and the resource category to sort in the calendar.
Regardless of the selected view, the displayed timeline can be:
- A weekly view to display the detail of the hours for each day of the selected week. Click on WEEK at the top right of the calendar to access the weekly view. By default, the calendar is displayed over 1 month but you can click on another duration (up to 6 weeks) from the drop-down list of the calendar's header to display several weeks in a row.
Note
The time slots displayed in the weekly view depend on the start and end time specified in the Calendar menu preferences.
- A monthly view, to display all the days (grouped per weeks) of the selected month. Click on TIMELIME MONTH at the top right of the calendar, to access the monthly view. By default, the calendar is displayed over 1 month but you can click on another duration (over 2 months, over 3 months, and so on) from the drop-down list of the calendar's header to display several months in a row.
- A yearly view, to display all the months of the selected year. Click on TIMELINE YEAR at the top right of the calendar, to access the yearly view. By default, the calendar is displayed over 12 months but you can click on another duration (over 13 months, over 14 months, and so on) from the drop-down list of the calendar's header to display several years in a row.
Click on  and
and  in the calendar's header to switch from a period to another. You can also click on the timeline displayed on the calendar's header (in red), to display a calendar and choose a timeline. If several months or years are displayed, the selected period in red defines the starting month or year.
Categorizing helps organize and filter projects by categories in the Project view menu or employees in the Employee view menu.
The levels of categorization available are limited to a maximum of 4 and they vary depending on the selected category. If you choose Employee in Category 1, then only one level of categorization will be available. However, you can also categorize by selecting Main skill > Service > Manager > Category 1, and you will have 4 levels of categorization.
The categories available vary depending on the menus:
- From the Project view menu, categories have shared items such as the company or the entity, and items specific to projects (customer, project category, etc.).
- From the Employee view menu, categories also include shared items and items specific to employees (manager, service, etc.).
| 1 | Click on CATEGORY in the calendar's header. |
| 2 | Choose Category 1 from the drop-down list. |
| 3 | Depending on the category that was previously selected, specify Category 2, Category 3 and Category 4. |
| 4 | Click on Validate. |
 The items displayed on the first column of the calendar are grouped based on selected categories, and categories are sorted in alphabetical order.
Examples
From the Project view menu, if you choose the Customer category, projects will be grouped per customer (sorted in alphabetical order) as follows: Customer A and its projects > Customer B and its projects > etc.
From the Employee view menu, if you choose the Service then Manager categories:
- Employees will be grouped per service (sorted in alphabetical order) as follows: Sales and the employees of that service > R&D and the employees of that service > Help Desk > etc.
- The employees of each service are grouped per manager (sorted in alphabetical order). In the R&D Service: Manager A and his/her employees > Manager B and his/her employees > etc.
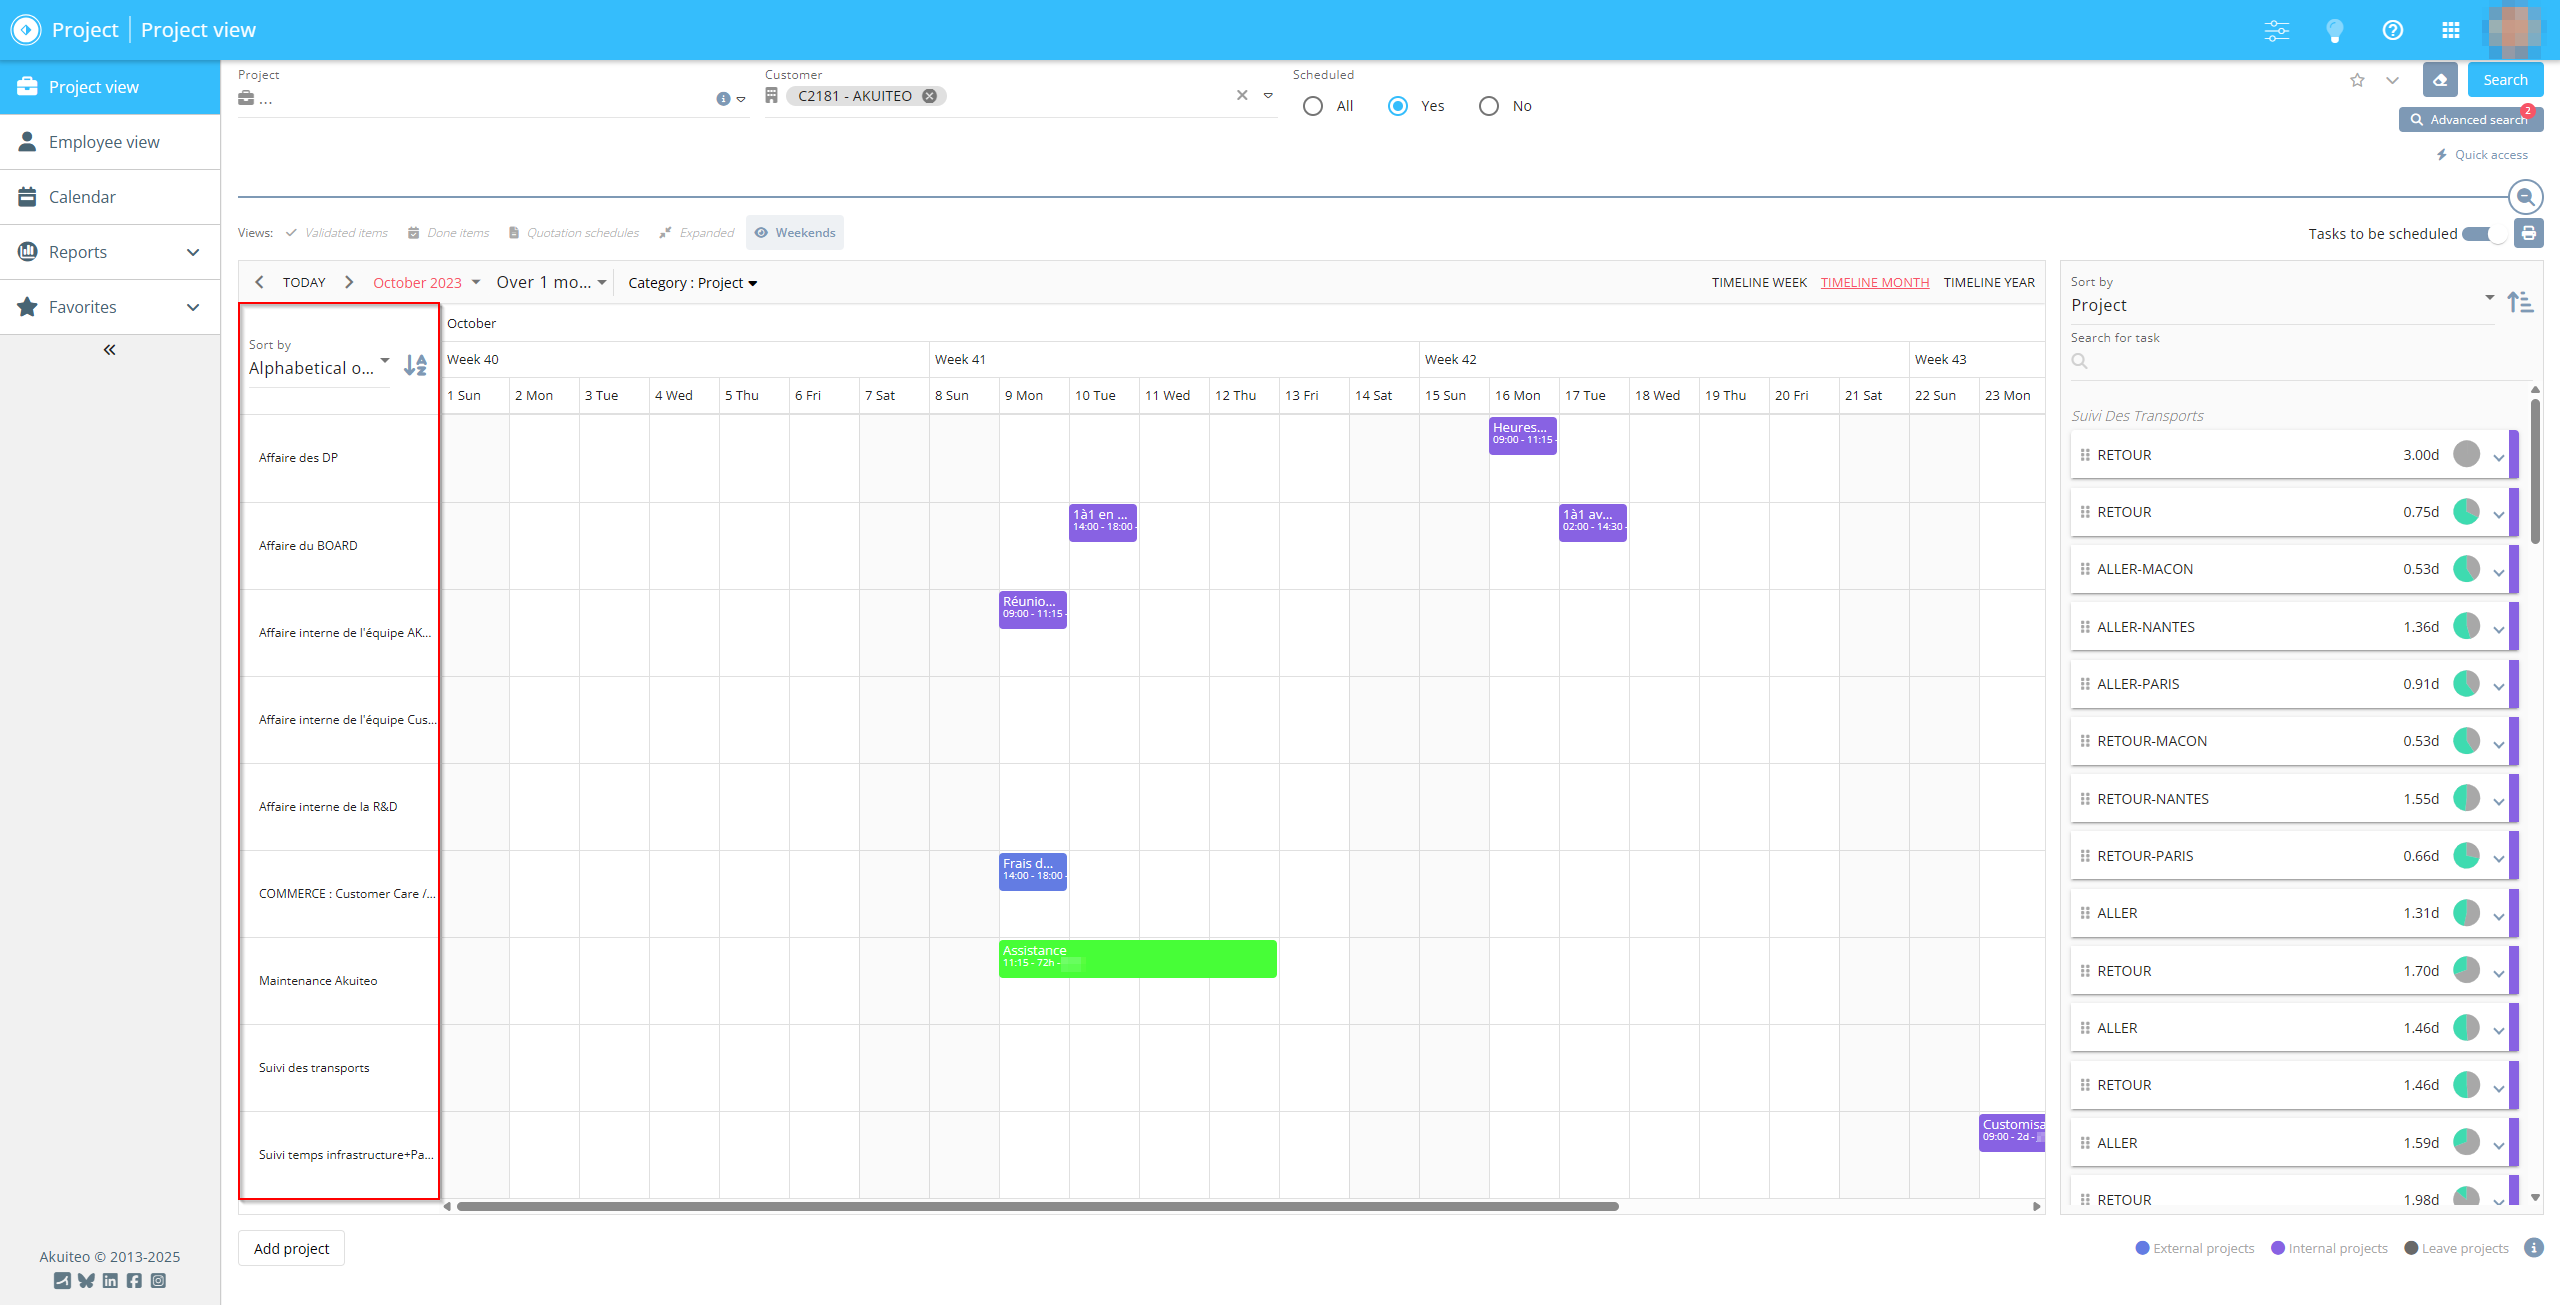
The resources column contains the list of resources matching the categorization selected from the header of the calendar. The list displayed can be sorted in ascending or descending alphabetical order.
When the user is in Project view, ongoing projects are displayed based on the selected timeline and specified criteria.
An ongoing project is a project with a state code for which the Schedule option is checked (General setup > Project > Project status code).
The setup for the Schedule line in General setup > Project > Locking of project, phases and sub-phases is also taken into account:
- The project will not be displayed if the Operational start date option is checked and the production is scheduled to end before the displayed timeline
- The project will not be displayed if the Operational end date option is checked and the production is scheduled to end before the displayed timeline
- The project will not be displayed if the Administrative closure option is checked and the project is already closed
A project will be displayed in Project view if its start date falls within the selected month. In this case, days preceding the project’s start date are shaded. Similarly, a project will be displayed if its end date falls within the month displayed in the calendar. In this case, the days following the project's end date are shaded.
The list in the Employee View menu displays active employees based on the selected timeline and the specified criteria.
An employee will not be displayed if:
- the arrival date in the company comes after the displayed timeline,
- the exit date from the company comes before the displayed timeline.
In the resource list, the Multi-compagny assignment label is added below the name of an employee assigned to several companies. As such, the planner can see all the scheduled tasks of a multi-companies employee (depending on how user partitioning was done).
If the arrival date of an employee is in the month displayed, the employee is displayed and the days before the arrival date are grayed out. Similarly, if the departure date of an employee is during the month displayed, then the employee is displayed and the days after the departure date are grayed out.
If scheduled items are linked to private projects or to projects the planner cannot access:
- In Project view, these items are not displayed.
- In Employee view, these items are displayed without detailed information. The item and its duration will be displayed, but with no details on the project to which the item is linked. No action can be carried out.
Resources displayed in the column can be sorted. The sorting also affects the categorization selected from the calendar header.
The sorting options are available in the Sort by field, from the header of the resources column:
- Alphabetical order - Sorts resources in ascending
 or descending
  alphabetical order.
 - Scheduled rate - Sorts employees depending on the scheduled rate, in ascending
 or descending
  order. This sorting option is only available from the Employee view menu when the Scheduled rate display option is active.
| DMF |
250117 PROJECT SCHEDULE VIEW PROJECT DETAILS 250119 PROJECT SCHEDULE VIEW EMPLOYEE DETAILS 250120 PROJECT SCHEDULE VIEW CUSTOMER DETAILS |
Project enables you to view the detailed information of a project, an employee or a customer without having to open the management object's record sheet from the Desktop Application. No data can be modified from these details window.
From the Project view menu, right-click on the desired project and click on:
- View project to open a window displaying detailed information about this project,
- View customer to open a window displaying detailed information about this customer.
From the Employee view menu, right-click on the desired employee and select View employee to open a window displaying detailed information about this employee.
Reference
The fields and custom data displayed or hidden in these windows can be customized. For more information, refer to Customizing the detailed information of a resource.
From the Project view menu click on a project in the first column of the calendar to access the detailed monthly view of this project.
Note
In the Employee view menu this detailed view represents the use of a Project-related filter, with the corresponding project only.
This detailed view shows all active employees on the selected timeline, that have at least one scheduled item linked to this project. All the scheduled items of the employees are displayed.
In a project's detailed view, the tasks to be scheduled only display the tasks linked to the selected project.
In the Employee view menu, click on an employee in the first column of the calendar to access the monthly detailed view of that employee.
Note
In the Project view menu, this detailed view represents the use of an Employee-related filter, with the corresponding employee only.
This detailed view shows all the projects that are linked to scheduled items allocated to the selected employee, and for which the selected timeline is included in the current timeline of the project. All the scheduled items of the projects are displayed.
In an employee's detailed view, the tasks to be scheduled only display the ongoing tasks for the displayed projects.
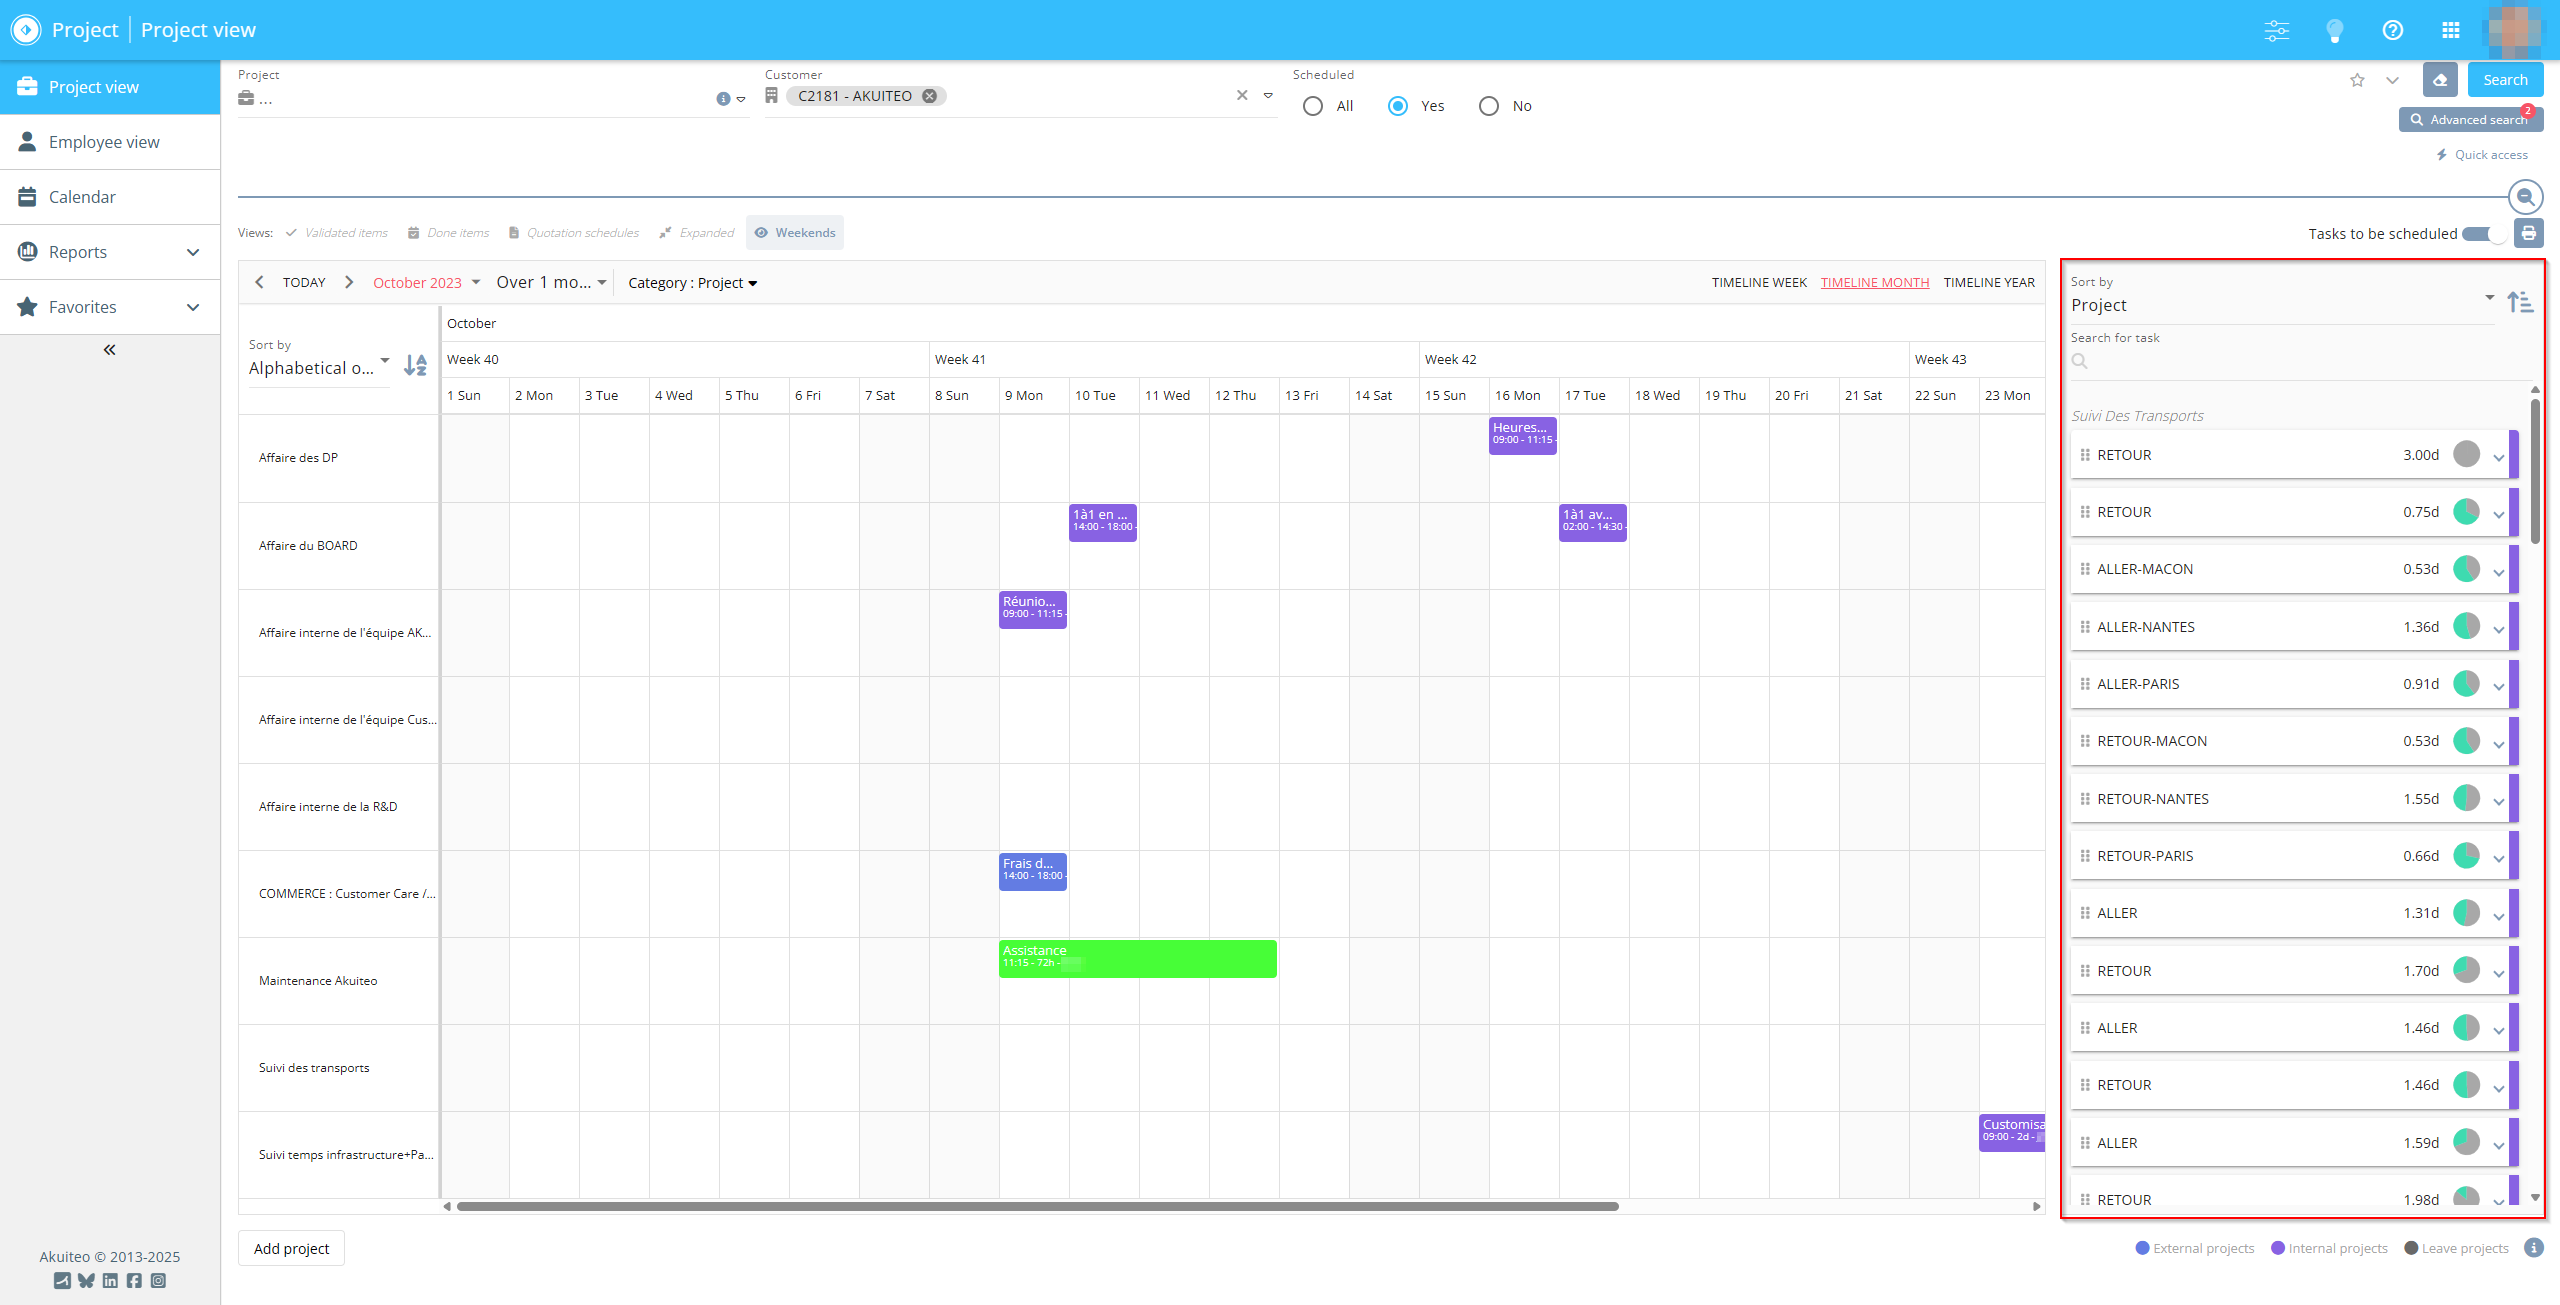
The tasks to be scheduled pane displays the list of tasks to be scheduled based on the view, the period and the criteria specified.
To display this pane, enable the Tasks to be scheduled option at the top of the screen.
Reference
For more information about the tasks to be scheduled, refer to Scheduled tasks.
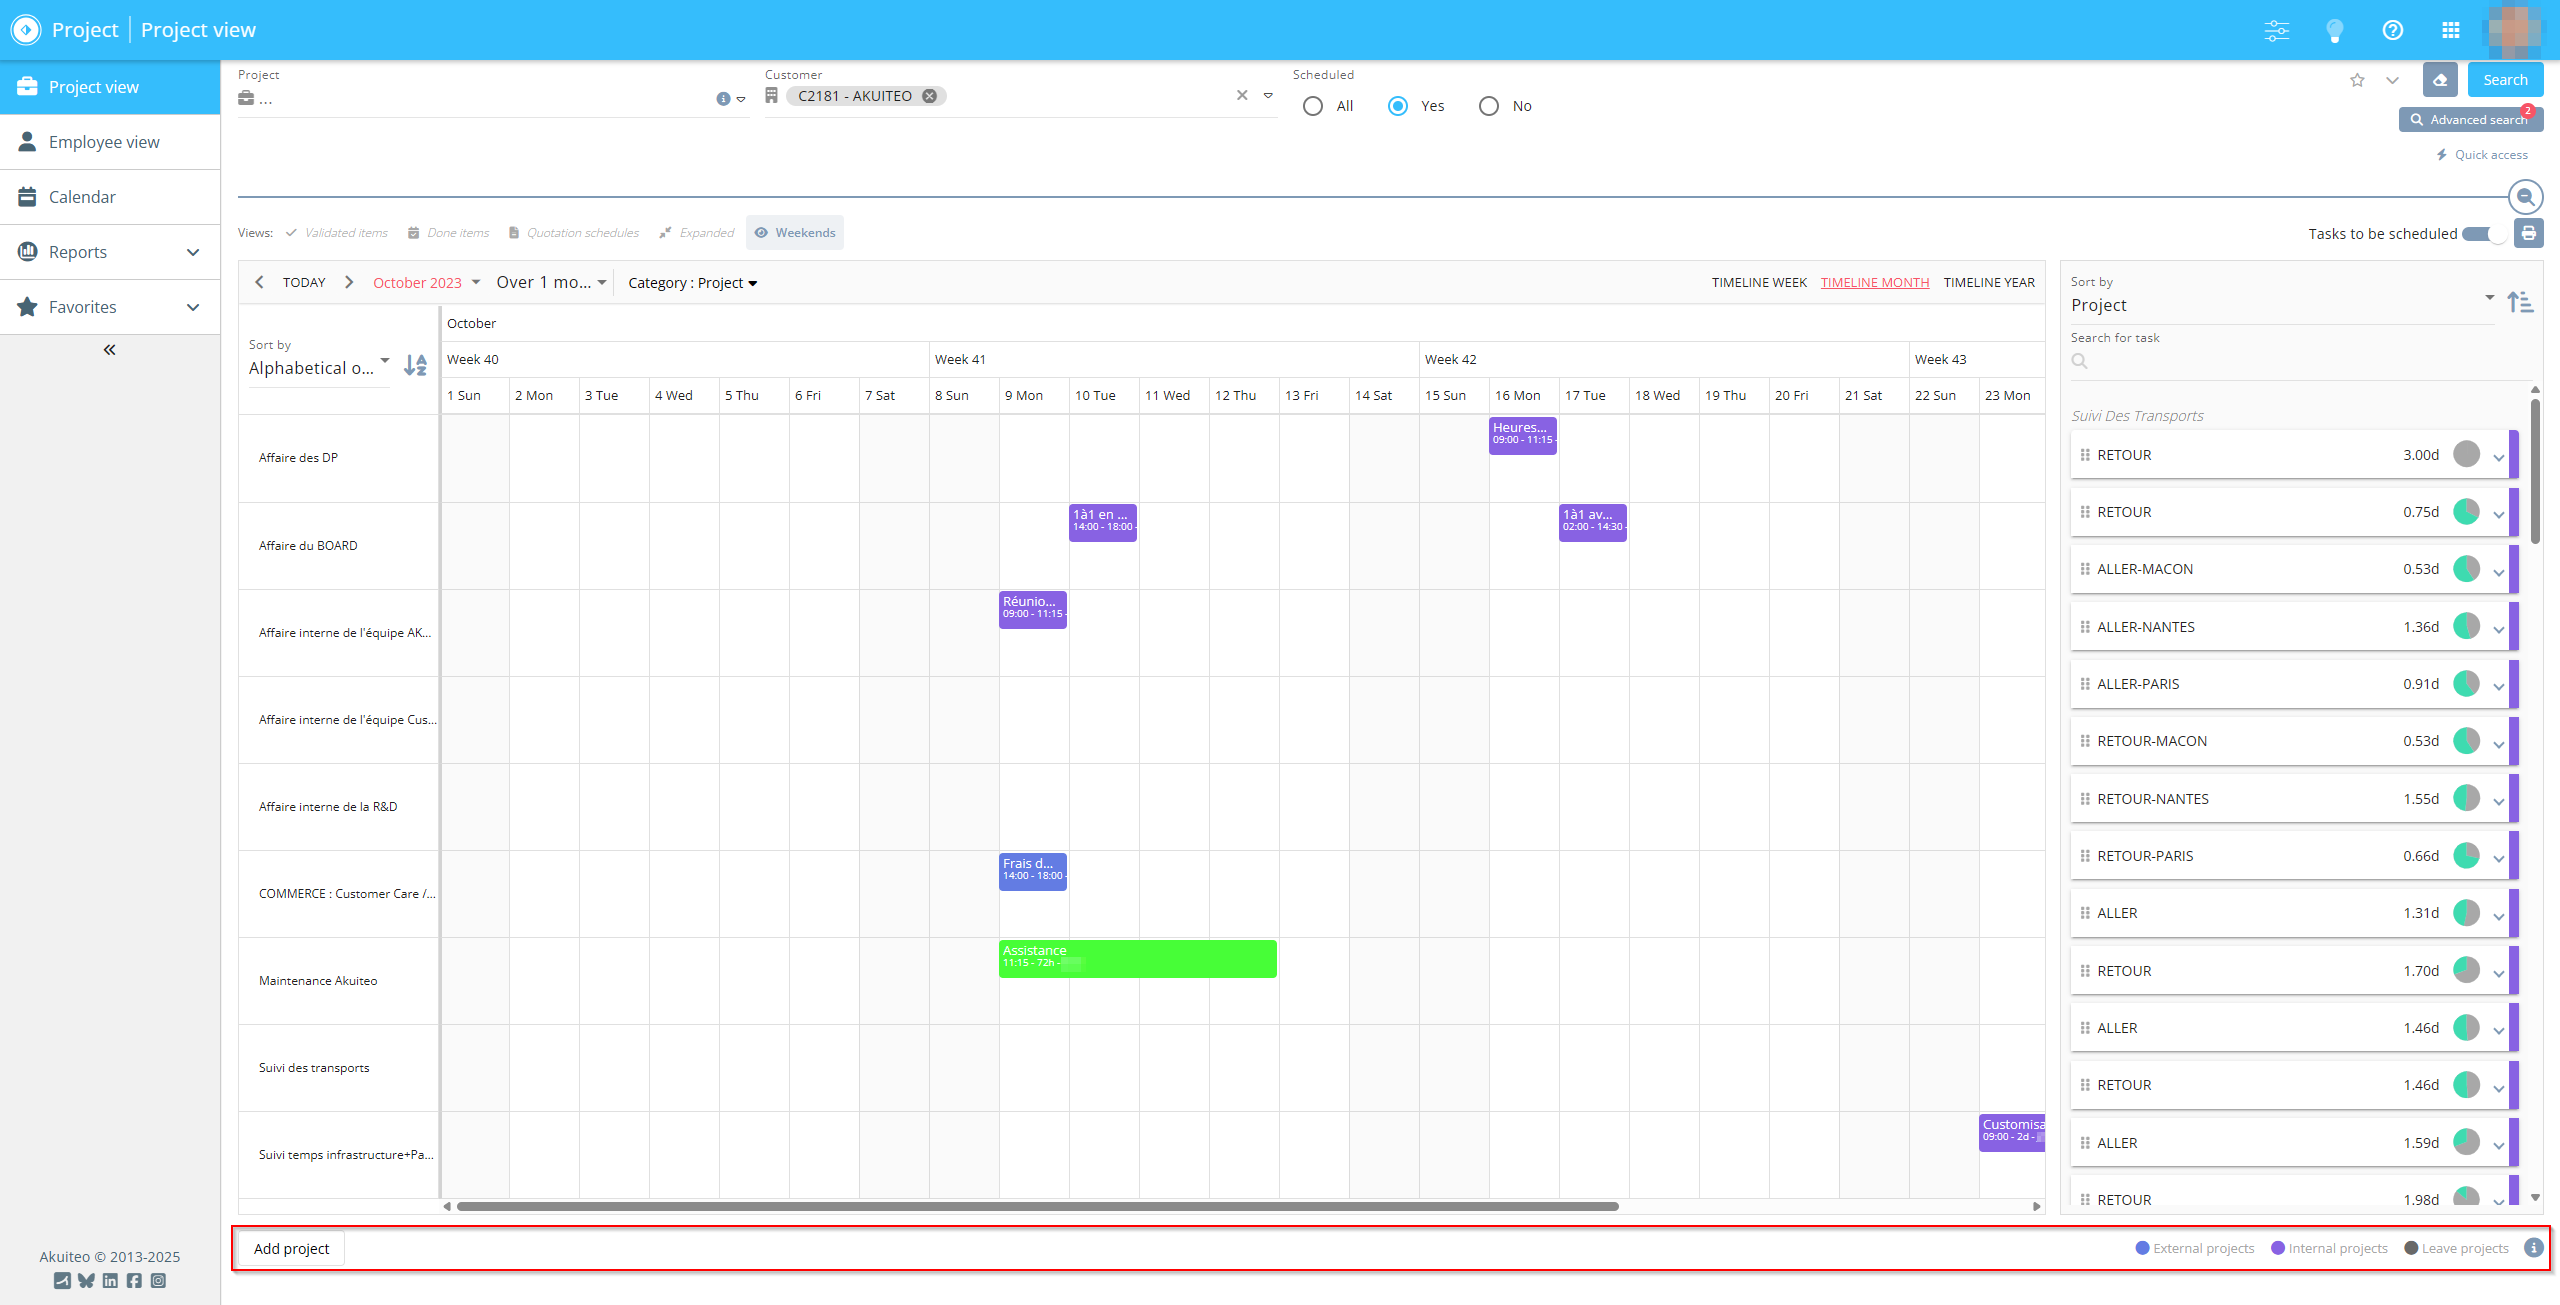
The page footer is used to add resources to the list of resources displayed in the calendar.
It is possible to add a project to the list of projects displayed in the calendar, when you are in any display of the Project view.
| 1 | Click on Add project at the bottom left of the calendar. |
| 2 | In the Project field, specify the code or the name of the desired project, or open the drop-down list to display all available projects. |
| 3 | Choose a project and click on Validate. |
The selected project is added to the calendar, including all its scheduled items.
You can therefore add scheduled items to a specific project or to allocate scheduled items to a project which is not linked to that employees.
Note
Added projects will not be saved if you refresh the page. Allocate an employee to the added project if you want it to be displayed in that employee's detailed view the next time you access it.
From the Employee view menu, an employee can be added to the list of employees displayed in the calendar.
| 1 | Click on Add employee at the bottom left of the calendar. |
| 2 | In the Employee field, specify the code or the name of the desired employee, or open the drop-down list to display the list of all available employees. |
| 3 | Choose an employee and click on Validate. |
The selected employee is added to the calendar, including all his/her scheduled items.
You can therefore add scheduled items to a specific employee or to allocate scheduled items to a project which is not linked to the displayed projects.
Note
Added employees will not be saved if you refresh the page. Allocate a task to the added employee if you want that employee to be displayed in the selected project's detailed view the next time you access it.


