The SAML (Security Assertion Markup Language) authentication is an open standard that makes it possible to use a single authentication on an identification portal for various applications.
Within the SAML protocol, there are two distinct entities:
- IdP (Identity Provider): The identities manager, that manages authentication and guarantees the authenticity of a person and of the information linked to that person. The following providers are among the most well-known: Microsoft ADFS (via Active Directory), Azure AD, Okta and Auth0.
- SP (Service Provider): The service provider that delegates the authentication to the IdP. This is the Akuiteo server.
Note
The SAML protocol provides two types of operations: the Authentication and the Provisioning. The Provisioning, which is used to create and feed an unknown user, is not handled by Akuiteo.
Important
The Web Portal and the Customer Portal can never replace the role of SP. You must have access to the Akuiteo server.
You must open the HTTPS flux between Akuiteo and the IdP to be able to exchange information.
As the SP is the Akuiteo server, the user must have access to the following addresses:
- /akuiteo/login.html
- /akuiteo/routing.html
- /akuiteo/saml/SSO
- /akuiteo/saml/logout
The user code must be the same as the user's email address.
The detailed process for creating a relying party trust is available in the Microsoft documentation. The process below describes the steps to set up SAML for Akuiteo specifically.
| 1 | From the server manager, click on Tools > AD FS Management. |
| 2 | From the Actions section on the right, click on Add Relying Party Trust. |
| 3 | In the creation window, specify the following information: |
- On the Select Data Source page, select Enter data about the relying party manually.
- On the Configure URL page, check the Enable support for the SAML 2.0 WebSSO protocol box and specify the relying party SAML 2.0 SSO service URL, that is to say the SAML URL of the Service Provider (Akuiteo), for example: https://XXXXX/akuiteo/saml/SSO.
Note
This URL must be secured and start with https://. It must also be accessible from an employee's computer (internal address of a local network or accessible from outside of the network).
- On the Configure Identifiers page, specify the Akuiteo server's URL, for example: https://akuiteo.myakuiteo.com/akuiteo.
- On the Choose Access Control Policy page, select the following strategy: Permit everyone.
| 4 | Complete the trust's creation. |
Now, you must create two claim rules:
- The first rule is a mapping one to link the AD's email field to the SAML message's email field.
- The second rule to transform the SAML message's email field into a NameID.
| 1 | From the list of relying party trusts, right-click on the new trust > Edit Claim Issuance Policy.... |
| 2 | From the Issuance Transform Rules tab, click on Add Rule... to create the first rule: |
- On the Choose Rule Type page, select the Send LDAP Attributes as Claims template.
- On the Configure Claim Rule page, select the following information:
- Attribute store = Active Directory
- LDAP Attribute = E-Mail Addresses
- Outgoing Claim Type = E-Mail Address
| 3 | Then, create the second rule: |
- On the Choose Rule Type page, select the Transform an Incoming Claim template.
- On the Configure Claim Rule page, select the following information:
- Incoming claim type = Email
- Outgoing claim type = Name ID
- Outgoing name ID format = Email
- Pass through all claim values checked
From the list of relying party trusts, right-click on the new trust > Properties > Advanced tab and check that the Secured hash algorithm is SHA-256. Specify that value if needed.
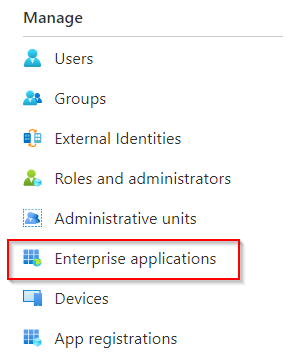
| 1 | In a web browser, enter the following address https://portal.azure.com/ and log in as an administrator. In the home page, click on the View button in the Manage Azure Active Directory section. |
| 2 | Click on Enterprise applications from the left menu, then click on New application from the header of the application page. |
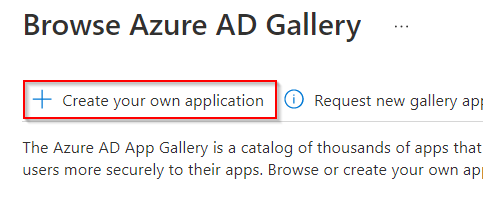
| 3 | Then, click on Create your own application. |
| 4 | Give an Input name to this new application (Akuiteo-Production for example) and leave the Integrate any other application you don't find in the gallery (Non-gallery) option checked. Then, click on Create. |
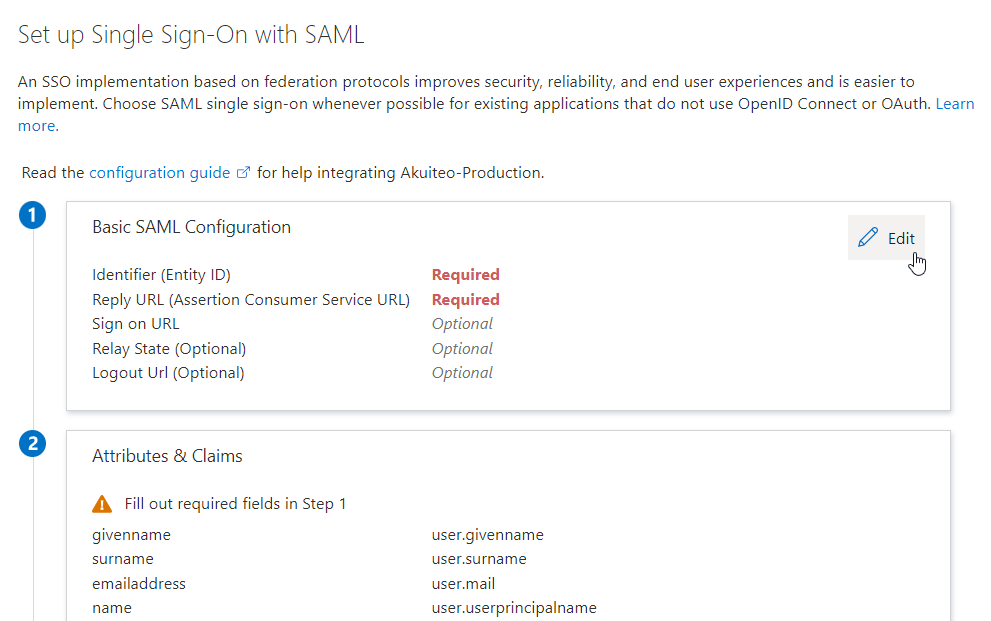
| 5 | On the new application's page, select the 2. Set up single sign on block then select the SAML block. |
| 6 | In the authentication configuration page, specify the required fields: |
- Identifier (Entity ID) - URL of your Akuiteo server, for example: https://akuiteo.myakuiteo.com/akuiteo
- Reply URL - URL for the SAML connection based on the previous URL (with the /saml/SSO suffix), for example: https://akuiteo.myakuiteo.com/akuiteo/saml/SSO
Note
This step is not required for SaaS customers.
The Akuiteo server must have a certificate file in the .jks format in order to encrypt the exchanges with the IdP. To do this, we use Java Keytool to create a self-signed certificate.
| 1 | On the Akuiteo server, run the following command line: |
keytool -genkey -keyalg RSA -alias saml -keystore saml.jks -keysize 2048| 2 | Specify the main information of the certificate and make sure to keep the file's password. The following is an example: |
Quels sont vos nom et prénom ?
  [Unknown]:  Akuiteo
Quel est le nom de votre unité organisationnelle ?
  [Unknown]:  IT
Quel est le nom de votre entreprise ?
  [Unknown]:  Akuiteo
Quel est le nom de votre ville de résidence ?
  [Unknown]:  Lyon
Quel est le nom de votre état ou province ?
  [Unknown]:  Rhône
Quel est le code pays à deux lettres pour cette unité ?
  [Unknown]:  FR
Est-ce CN=Akuiteo, OU=IT, O=Akuiteo, L=Lyon, ST=Rhône, C=FR ?
  [non]:  oui

Entrez le mot de passe de la clé pour <saml>
        (appuyez sur Entrée s'il s'agit du mot de passe du fichier de clés) :
Ressaisissez le nouveau mot de passe :

Warning:
Le fichier de clés JKS utilise un format propriétaire. Il est recommandé de migrer vers PKCS12, qui est un format standard de l'industrie en utilisant "keytool -importkeystore -srckeystore saml.jks -destkeystore saml.jks -deststoretype pkcs12".
 A saml.jks file is generated. This file will then be used for configuring Akuiteo.
On the Akuiteo server, run the following command line:
keytool -export -alias saml -keystore "C:\Keys\saml.jks" -rfc -file C:\Keys\saml.certWhere the path contains a reference to the Akuiteo server.
If needed, import the saml.cert file on ADFS.
On Akuiteo's side, the information to configure SAML is defined in the Administration console, from the Security > SAML menu.
| 1 | From the SAML configurations screen, click on the New configuration button at the top right of the screen. |
| 2 | In the configuration window, specify the following fields: |
| Field | Description |
|---|---|
| Code | Specify a code to identify the configuration. This code must be unique. |
| Active configuration |
Check this box to activate the SAML authentication. If the box is not checked, the authentication will be based on another authentication method (if active) or on the database. |
| IDP |
Specify the IdP's identifier field, which is the Entity ID. You can find this ID in the metadata.xml field. If you use Active Directory, this is the Azure AD Identifier. |
| Audience |
Specify the application ID for the IdP and the public URL. If you use Active Directory, this is the Identifier (Entity ID). |
| MetaLocation |
Specify the location of the metadata file (URL or local file). If you use Active Directory, this is the URL of the federation metadata file. |
| KeyAlias |
Specify the alias of the certificate file (.jks). |
| KeyPwd |
Specify the password of the certificate file (.jks). |
| KeyLocation | Specify the location of the certificate file (.jks). |
| userNameDomains |
When the SAML authentication is active, any email login is redirected by default to the IdP in order to be authenticated. If you want to limit this authentication to specific email domains, add those domains in the userNameDomains field. That field allows you to specify:
|
| redirectDomainWhitelist |
If the authentication domain is different from the domain used to access the Akuiteo application, the authentication domain must be authorized on Akuiteo's business server. In that case, specify the authentication domain to authorize. For example: exemple.authentification.com |
Note
For the MetaLocation and KeyLocation files, the protocol must be specified in the header. If a file is stored locally, add file:/ at the beginning of the path.
| 3 | Click on Save. |
If the connection is made, the configuration is added to the Administration console. If the connection cannot be made, an error message is displayed.
| 4 | Restart the server to take the configuration into account. |
To modify a configuration, click on  for the relevant line, make all necessary modifications then click on Update.
To delete a configuration, click on  for the relevant line then confirm the deletion.
| 1 | From the Tomcat installation directory of the Akuiteo server, go to conf. |
| 2 | Open the context.xml configuration file with a text editor. |
| 3 | Remove the comment on the <Manager ... /> tag as follows: |
<Context>
    <!-- Default set of monitored resources -->
    <WatchedResource>WEB-INF/web.xml</WatchedResource>

    <!-- Uncomment this to disable session persistence across Tomcat restarts -->
    <Manager pathname="" />

    <!-- Uncomment this to enable Comet connection tacking (provides events
         on session expiration as well as webapp lifecycle) -->
    <!--
    <Valve className="org.apache.catalina.valves.CometConnectionManagerValve" />
    -->
</Context>When there is a SAML connection ongoing, the Web Portal and Customer Portal redirect to the Akuiteo server in order to initiate the SAML connection. Therefore, the external / public address of the Akuiteo server must be known to the portals.
To do this, two solutions are available:
- From the Administration console > Configuration > General > External URL of the Akuiteo server, specify the URL of the server to use, or
- From the data base, execute the following request:
UPDATE t_properties
SET tpro_value = 'https://akuiteo.myakuiteo.com/akuiteo'
WHERE tpro_code = 'server.external.url'
AND tpro_type = 't9-gestion'If a reverse proxy is used as front of Akuiteo's business server, you must add the following configuration to Tomcat's HTTP connector (server.xml or context.xml configuration file):
<Connector port="${http.port}"
    protocol="org.apache.coyote.http11.Http11NioProtocol"
    server="Akuiteo"
    proxyName="akuiteo.xxx.com"
    proxyPort="443"
    scheme="https"
/>
Where:
- proxyName is the DN to access Akuiteo via a reverse proxy
- proxyPort is the access port to Akuiteo via a reverse proxy (usually 443)
- scheme is the access protocol to Akuiteo via a reverse proxy (usually https)
If the Akuiteo server and the web portals are hosted on separate Tomcat instances, you must "align" the JWT secret, that is to say make sure this secret is the same between all the instances. This secret is used for encrypting employees' login between the various Akuiteo servers. A secret of 63 alphanumeric characters is needed only.
Tip
To generate the JWT secret, you can use a generator (for example https://www.grc.com/passwords.htm).
Specify the secret in the JVM parameters of each Tomcat by adding, for example:
-Djwt.secret=XXXXXXXXXXXXXXXXXXXXXXXXXXXXXXXXXXXXXXXXXXXXX


